
Zoom: Teach your class in real-time from anywhere
Bring your questions to our office hours. Sign up below.
What is Zoom?
Zoom is a video conferencing tool. In this environment you can talk, be seen on camera, participate in the text chat, and share your screen to present content to others. Zoom also enables real-time chatting via text. If you choose to use this, it can be a great way for students to ask questions without interrupting your presentation.
To use Zoom you will need
- A computer with a built-in camera and microphone or a separate web camera. (The Learning Science Lab has a few. Please ask if you would like to borrow one.) If you'd like to buy your own, we recommend this webcam.
- Earbuds or a headset will reduce or eliminate the echo that is common in group video conference sessions
- A reliable internet connection
Step 1: Activate your NYU Zoom account
If you haven’t, activate your NYU Zoom account before you do anything else. Always use your NYU NetID with Zoom, not your Stern email.
How? Just head to https://nyu.zoom.us/ and choose "Login to Zoom." Use your NYU NetID DO NOT USE your Stern email.Note: the videos on this page do not have audio. If you experience a problem with the video quality, click on the settings cog in the bottom right of the video pane and choose 720HD. The playback quality depends on your internet connection
Step 2: Set up Zoom in NYU Classes
Note: Some course sites have had Zoom automatically added to them. If you see Zoom in the tool menu on the left of your course site you can skip this step.
The best way to use Zoom for teaching purposes is to activate the Zoom tool in NYU Classes. This gives your students automatic access to scheduled Zoom sessions and makes it easy for them to find recordings.
How? Go to Settings > Add Edit Tools > Zoom
The best way to use Zoom for teaching purposes is to activate the Zoom tool in NYU Classes. This gives your students automatic access to scheduled Zoom sessions and makes it easy for them to find recordings.
How? Go to Settings > Add Edit Tools > Zoom
Step 3: Schedule a meeting
Schedule your Zoom meeting from NYU Classes, that way your students will automatically get access to it.
How? Go to Zoom > Schedule a Meeting Here are some setting suggestions for your meetings: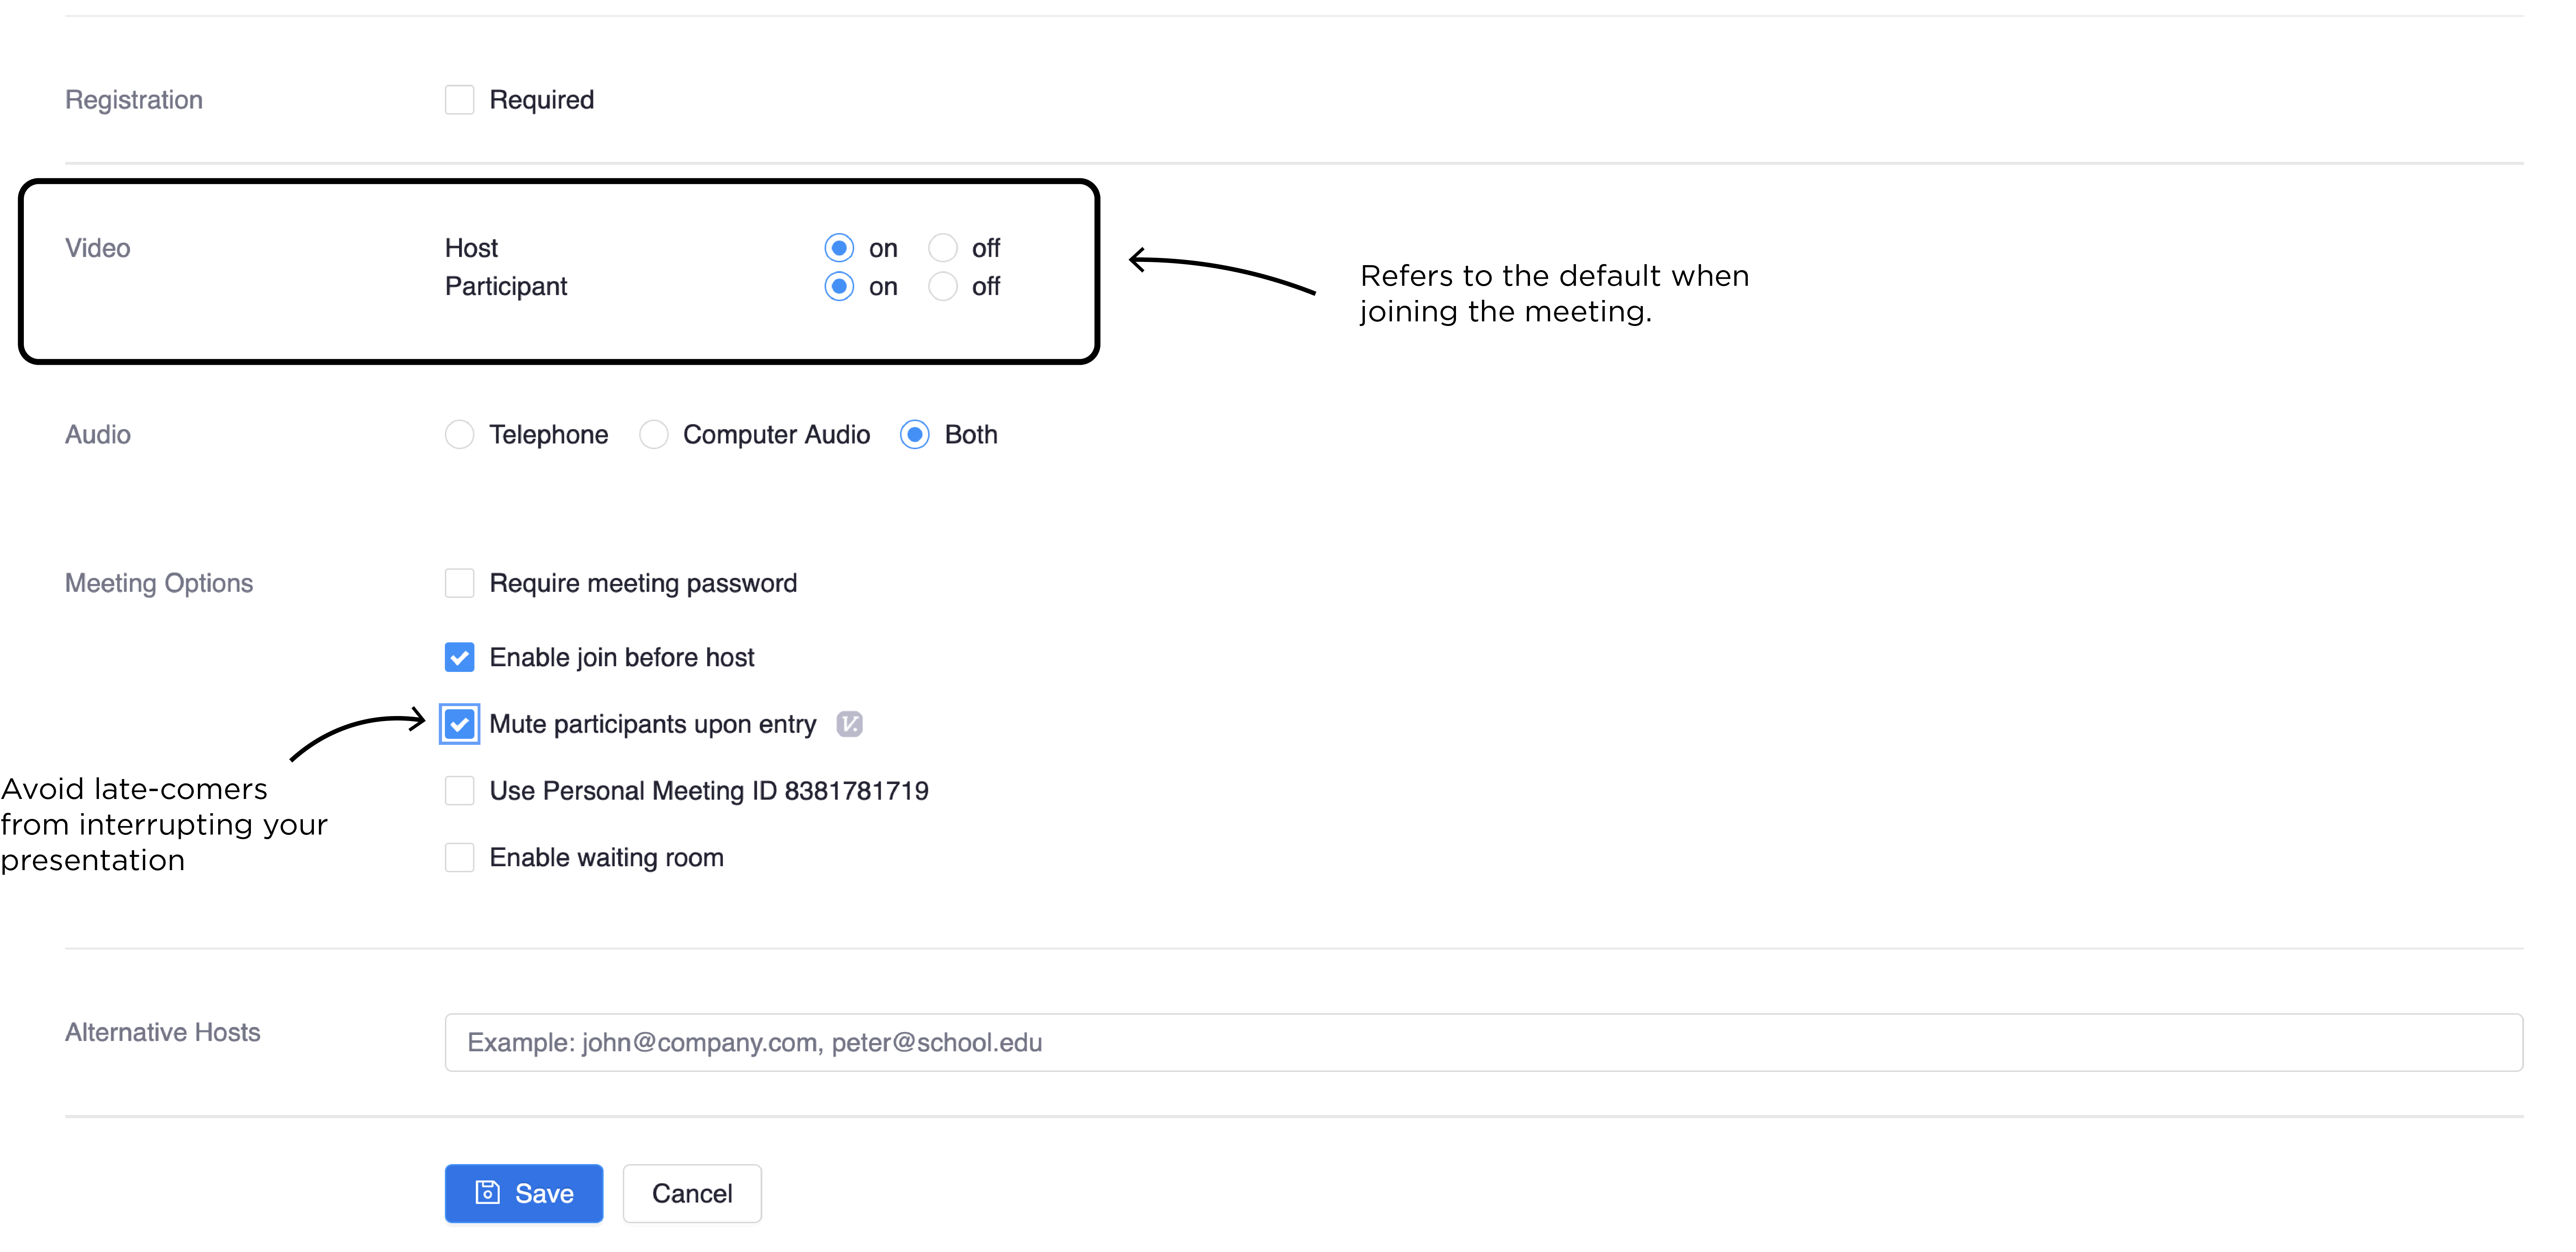
How? Go to Zoom > Schedule a Meeting Here are some setting suggestions for your meetings:
- Turn video for host and participant on by default
- “Enable join before host” to allow people coming early to join before you do and avoid confusion (including emails like, “the meeting isn’t working!”).
- Mute participants upon entry, so late people join quitely.
Do I need to invite students?
No. If you created the meeting through NYU Classes, you don’t need to send an invite to your students. They already have access to the meeting through NYU Classes.
You may want to send an announcement after you schedule the meeting, as Zoom does not notify students that a meeting has been scheduled.
Step 4: Do I need to download Zoom?
If you don’t already have Zoom software on your computer, when you try to start a meeting, it will download itself and want to install.
- Allow your computer to download Zoom.
- Click through the steps to complete the download (this is a one time process).
Step 5: Zoom is asking me to sign in: What do I do?
If the Zoom application on your computer asks you to sign in, always use the SSO (Single Sign-On) option -- nyu.zoom.us
This will open a browser window to sign into NYU with your NetID. Click on your user icon in the top right to confirm you are signed in as a Licensed User of your NYU Zoom Account.
This will open a browser window to sign into NYU with your NetID. Click on your user icon in the top right to confirm you are signed in as a Licensed User of your NYU Zoom Account.
Step 6: Start your meeting and record it
Plan to launch your meeting at least 15 minutes early to test your settings, especially if you are new to Zoom.
How? Go to Zoom and choose “Start” on the meeting you have scheduled
Recordings are saved automatically to your Zoom account for 120 days and can be accessed by you and your students in NYU Classes under Cloud Recordings (faculty) Previous Meetings (students).
How? Press the record button when you launch your meeting. Students will be notified that the session is being recorded.
Note: If you want to save the recording for longer than 120 days, you will need to download it.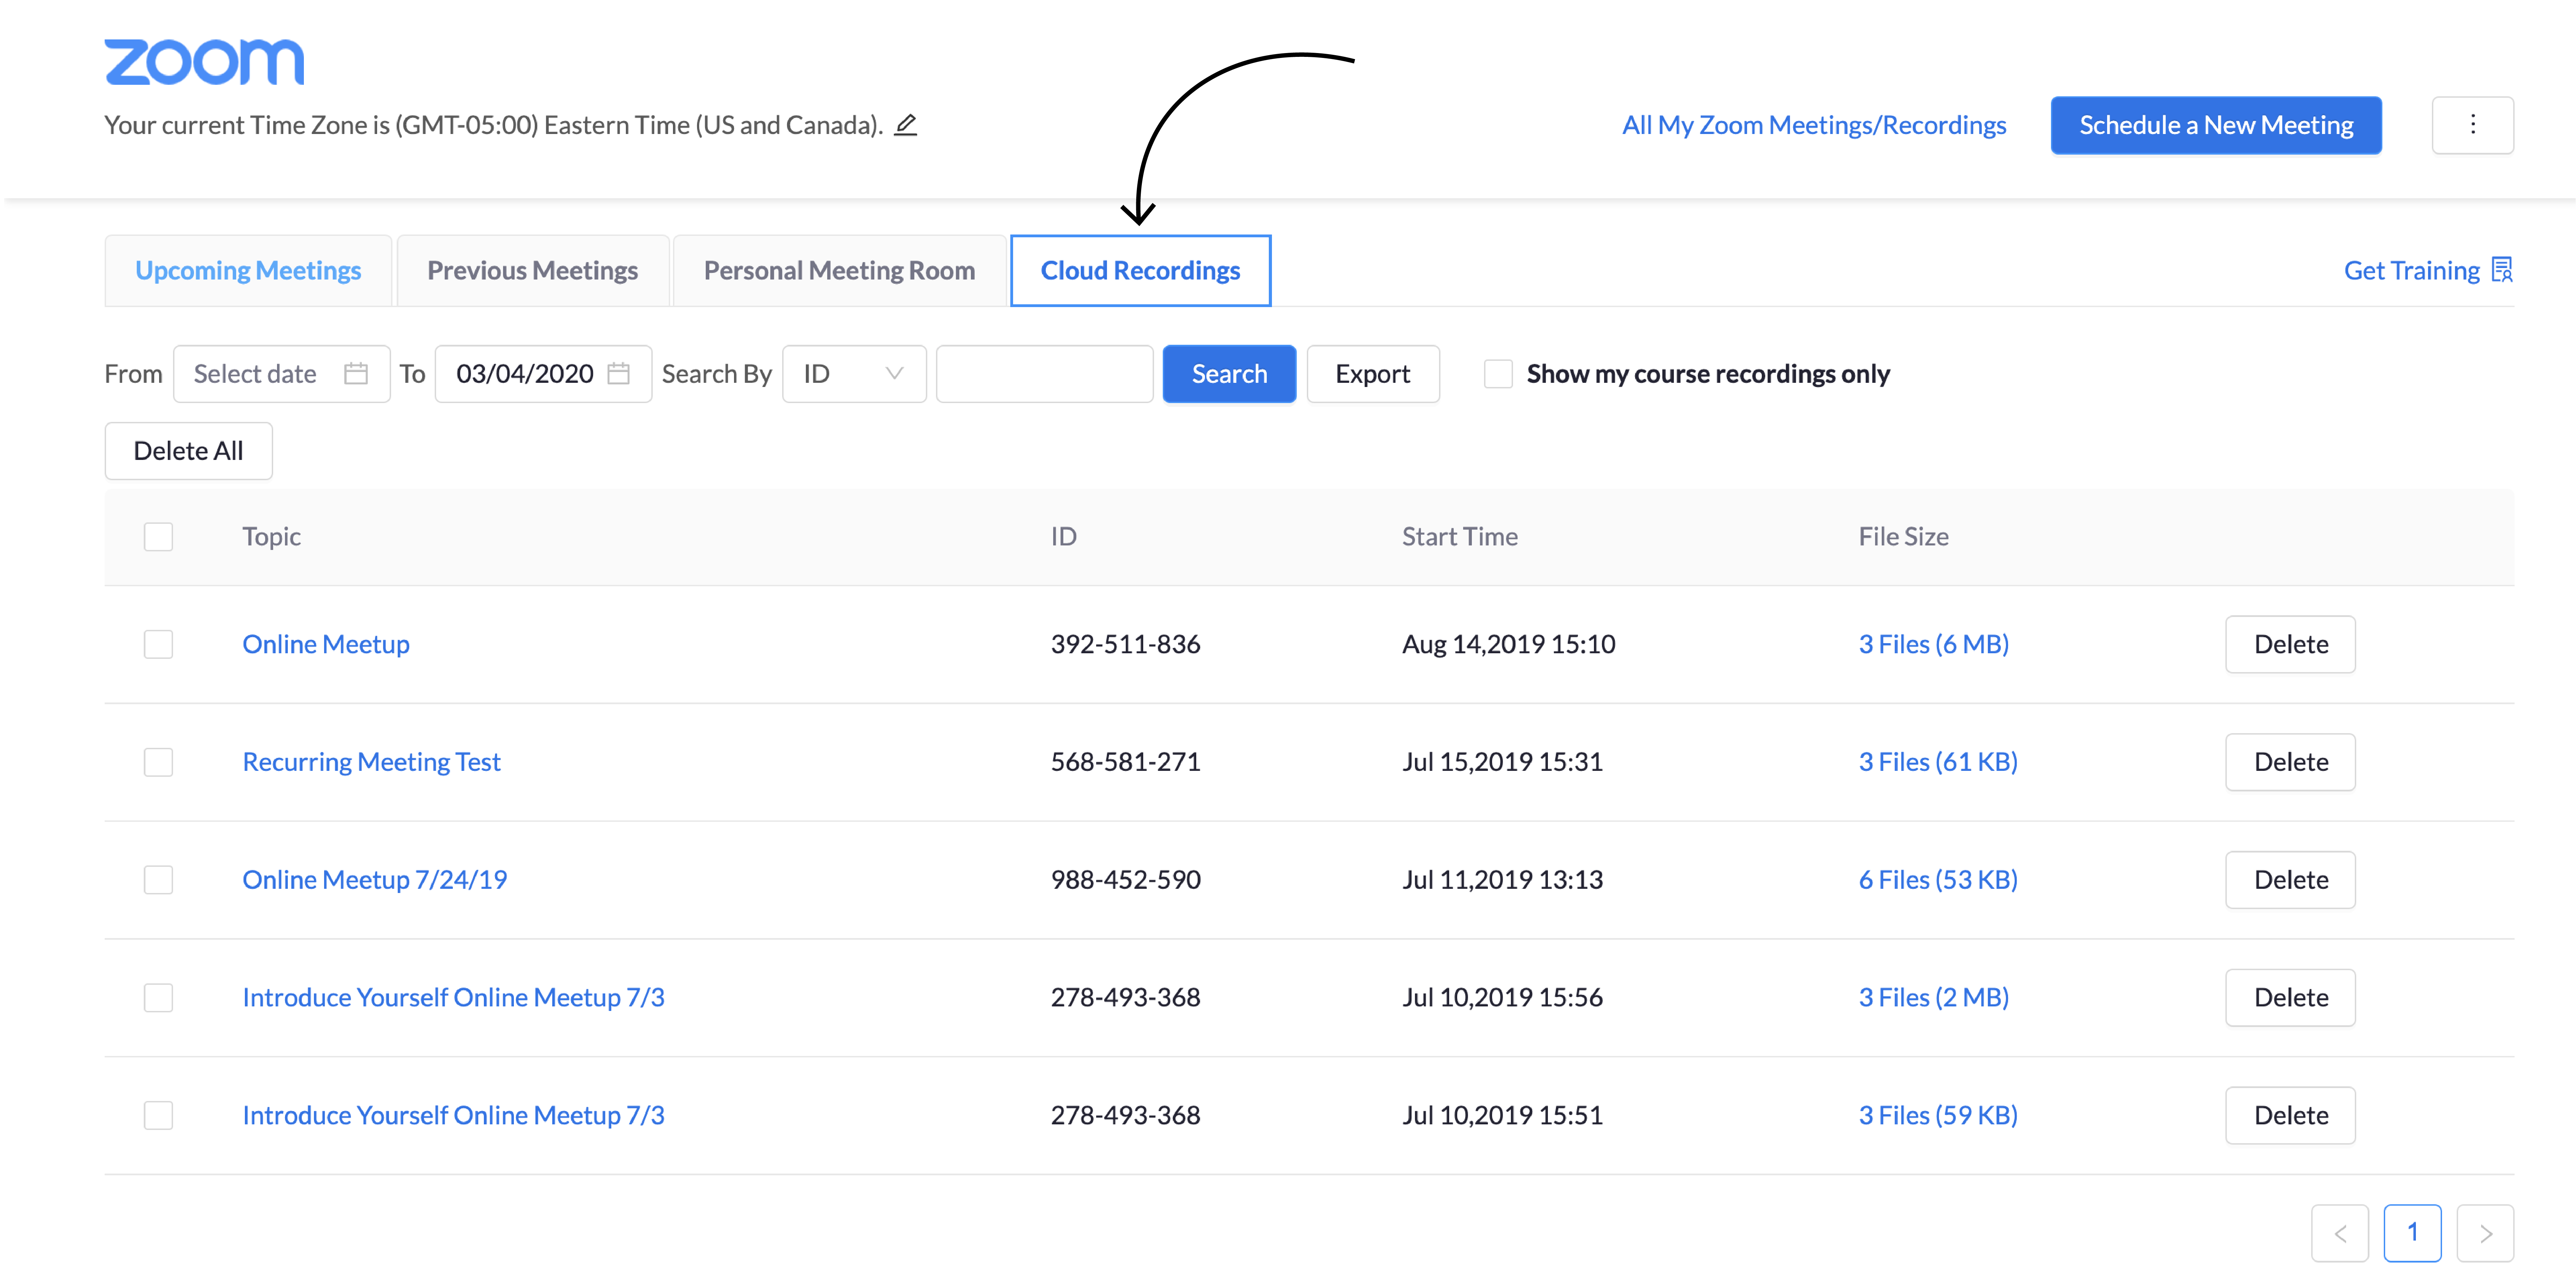
Step 7: Make sure your audio and video are working
Click Join with Computer Audio when the meeting launches.

Check your Audio: Use the up arrow next to the microphone button in the bottom left of the control panel to select the microphone and speakers you want to use (if you have more than one choice) and to test your speaker and microphone. Check your Video: Use the up arrow next to the camera button on the bottom left to adjust your video settings and select the video camera you would like to use (if you have more than one). We also recommend clicking Video Settings and then check Enable HD for a clearer video picture.
Check your Audio: Use the up arrow next to the microphone button in the bottom left of the control panel to select the microphone and speakers you want to use (if you have more than one choice) and to test your speaker and microphone. Check your Video: Use the up arrow next to the camera button on the bottom left to adjust your video settings and select the video camera you would like to use (if you have more than one). We also recommend clicking Video Settings and then check Enable HD for a clearer video picture.
Step 8: Use the Zoom controls to manage your meeting
Click through the slides below which explain some of the basic controls you will use in Zoom.
Step 9: Share your screen
Use the green share button to let students see something you have open on your computer. They can still see you, but what you are sharing will be the focus.
You can choose to share your entire screen, or just one application -- a presentation, document, browser window, etc. Entire screen is the simplest option.
When you share your screen your meeting controls will move to the top of your screen.
Choose the red stop sharing button to go back to the main meeting controls.
Step 10: Manage the participants in your meeting
Use the Manage Participants control to see who is in the meeting. You can even mute and unmute students. Use Chat to collect students' written questions or responses.